Red Chile Sauce From Dried Chiles for the Week
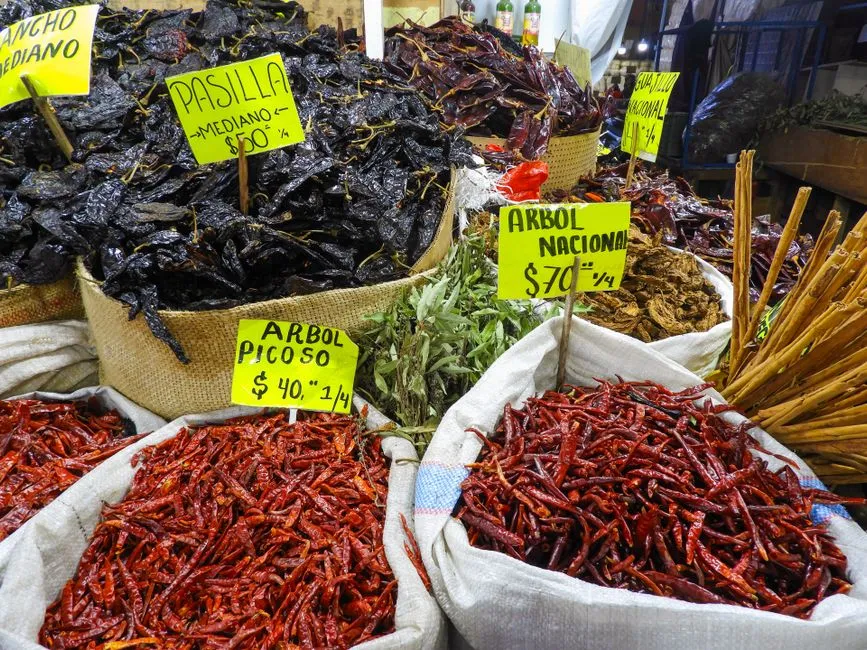
- A red chile sauce built for three dinners
- Recipe at a glance
- Ingredients for 720 millilitres
- Change the chile blend, not the total weight
- Reject damaged pods before they reach the pan
- Clean, stem, and weigh the chiles
- Toast only until the aroma opens
- Soak for 30 minutes, then use fresh water
- Blend with 600 millilitres first
- Cook the strained puree without scorching it
- Set the final yield instead of guessing at thickness
- Divide the batch for the week
- Refrigerate for three days or freeze
- This is not a canning recipe
A red chile sauce built for three dinners
To make red chile sauce from dried chiles, stem and seed sound pods, toast them only until fragrant, soak them in boiling water for 30 minutes, and blend them with fresh water, onion, garlic, oregano, and salt. Strain the puree, cook it in a little oil, then adjust the finished sauce to a measured yield. This 80-gram chile formula makes 720 millilitres: three 240-millilitre portions for cooking now, refrigerating, and freezing.
The useful part is not pretending every bag of chiles behaves identically. It is keeping the total prepared chile weight, blending liquid, and final yield fixed so you can change the blend without losing the sauce.
Recipe at a glance
- Yield: 720 millilitres, or 3 portions of 240 millilitres
- Pan: 3- to 4-litre heavy saucepan or Dutch oven
- Preparation: 15 to 20 minutes
- Toast: 4 to 6 minutes for the batch
- Soak: 30 minutes
- Blend and strain: 12 to 18 minutes
- Cook and adjust: 18 to 24 minutes
- Total: 79 to 98 minutes
Minimum: 15 + 4 + 30 + 12 + 18 = 79 minutes. Maximum: 20 + 6 + 30 + 18 + 24 = 98 minutes.
Some preparation can happen during the soak, but the full range is more honest for a first batch. Pod thickness, blender power, strainer mesh, pan width, and evaporation move the clock.
Ingredients for 720 millilitres
- 60 grams prepared dried guajillo chiles
- 20 grams prepared dried ancho chiles
- 1.5 litres water for washing and soaking, plus more as needed; discard after use
- 720 millilitres fresh water, divided, plus a little more for final adjustment if needed
- 100 grams white onion, roughly chopped
- 10 grams garlic, roughly 2 medium cloves
- 15 millilitres neutral cooking oil
- 1 gram dried Mexican oregano, optional
- 4 grams fine salt to start, plus more after tasting
"Prepared" means weighed after stems and loose seeds are removed. Whole-pod counts are too variable for this formula: one leathery ancho and one compact guajillo do not agree on what "one chile" means.
The 60:20 blend is a dependable middle. Guajillo carries the bright red body; ancho makes the sauce darker and rounder. Those are tasting descriptions, not guaranteed heat levels. Variety labels, growing conditions, and storage all matter, so taste the cooked batch before deciding it is mild enough for everyone.
Change the chile blend, not the total weight
Keep the prepared chile total at 80 grams and choose one of these starting points:
| Direction | Guajillo | Ancho | What changes |
|---|---|---|---|
| Brighter | 70 g | 10 g | Redder color and a lighter dried-fruit profile |
| Balanced | 60 g | 20 g | Enough ancho depth without making it dominant |
| Deeper | 40 g | 40 g | Darker color and a fuller ancho presence |
None of these ratios promises a particular heat. If heat needs to be optional, make the base sauce first and put a hotter salsa on the table. Adding chile de árbol to the whole pot changes both heat and flavor, and it is harder to reverse than to offer separately.
If you want to understand the preparation before turning it into dinner, the site's dried-chile guide covers pod condition, brief toasting, soaking, blending, and straining in detail.
Reject damaged pods before they reach the pan
Use dry pods with a clear chile aroma and no visible mould, insect infestation, damp patches, or decay. New Mexico State University's guide to dried chile sauce gives the same condition screen and says decorative ristras treated with plastic, shellac, or insecticide are not edible.
Wear food-safe gloves if hot peppers irritate your skin or if you wear contact lenses. Do not touch your face while handling the pods. The University of Minnesota Extension advises gloves for hot peppers and handwashing before touching the eyes.
Open a window or run an exhaust fan that vents outside. Keep children and pets away from the work area. If the pan smokes or anyone coughs, remove it from the heat and ventilate before continuing.
Clean, stem, and weigh the chiles
Cut off each stem, slit the pod, and shake out the loose seeds. Pull away the largest pale ribs if you want less heat, but do not assume this makes an unknown batch mild.
Wash the opened pods in warm water. Lift them out rather than pouring the washing water back over them, replace the water, and repeat until no grit remains. NMSU's method uses repeated warm-water washing before rehydration. Drain well and blot the pods dry before toasting so water does not spit in the skillet.
Now weigh the prepared pods. Adjust the blend until the total is exactly 80 grams. That measurement is what lets the three blend options share one liquid ratio.
Toast only until the aroma opens
Heat a dry heavy skillet over medium-low. Add one or two opened pods at a time. Press each flat for 5 to 10 seconds, turn it, and give the second side another 5 to 10 seconds. Remove it when it smells fragrant and feels slightly more flexible.
The batch usually takes 4 to 6 minutes in small rounds. Dark blistering, sharp smoke, or an acrid smell means the pan is too hot or the contact is too long. Discard a badly scorched pod, wipe out black flakes, and lower the heat. Burned chile makes bitter sauce, and additional onion will not remove that flavor.
Brief toasting is a flavor choice, not a safety requirement. Skip it if ventilation is inadequate. The pods will still soften during the soak.
Soak for 30 minutes, then use fresh water
Move the chiles to a heat-safe bowl and cover them with boiling water from the 1.5-litre allowance. Set a small heat-safe plate on top to keep them submerged. Soak for 30 minutes, the time used in the NMSU dried-pod method.
Test the thickest piece. It should bend and tear easily, and the flesh should separate readily from the skin. Give unusually thick but otherwise sound pods another 5 to 10 minutes if needed.
Drain the chiles and discard the soaking water. It can be bitter or dusty, so this recipe uses measured fresh water instead. Do not count the soak as part of the 720 millilitres listed for blending and adjustment.
Blend with 600 millilitres first
Let the softened chiles cool enough for your blender. Add them with 600 millilitres of the fresh water, the onion, garlic, oregano, and 4 grams salt. Keep the remaining 120 millilitres aside.
Blend for 60 seconds, stop the machine safely, scrape down the jar, and blend for another 45 to 60 seconds. If the mixture will not circulate, use some of the reserved water in 15-millilitre increments and record how much you add.
Follow the blender manufacturer's instructions for warm liquids, venting, and fill limits. Do not seal very hot liquid in a blender jar; pressure can force the lid upward.
Press the puree through a medium-mesh strainer into a bowl. Work it with a flexible spatula and scrape the underside of the strainer. Discard the tough skin residue. A coarser sauce is possible, but straining makes this batch easier to use for enchiladas and smooth braises.
Cook the strained puree without scorching it
Set the saucepan over medium-low heat and add the oil. When the oil moves easily across the pan, take the pan off the burner. Add the strained puree slowly; water-rich puree can spit when it meets hot oil. Return the pan to medium-low heat once the first sputtering settles.
Stir continuously for 2 minutes, scraping the bottom and corners. Then lower the heat and simmer gently for 15 minutes, stirring every minute or two. NMSU directs cooks to simmer chile puree for 10 minutes before further use or storage and gives a longer gentle simmer for its finished enchilada sauce. This formula uses 17 minutes of cooking after the puree meets the oil.
If the base catches, move the unburned sauce to a clean pan without scraping up black deposits. A scorched flavor is a reason to restart when it dominates the batch.
Set the final yield instead of guessing at thickness
Pour the cooked sauce into a heat-safe measuring jug. If it measures less than 720 millilitres, add enough freshly boiled water, from the reserve or additional water, to reach 720 millilitres. If it measures more, return it to the pan and simmer until it reaches the mark. Return any adjusted sauce to the pan and simmer for 1 final minute.
The target is a pourable cooking sauce that coats a spoon lightly, not a table salsa and not a paste. Fixing the final volume gives each 240-millilitre portion the same concentration. If you reduce one portion later for a specific dish, that change belongs to that dish.
Taste only after the sauce has completed its simmer. Add salt in 1-gram increments, stirring and tasting between additions. If it tastes dull, check salt before reaching for sugar. If it tastes sharply bitter, review the pods, toast, and soaking water rather than sweetening by reflex.
Divide the batch for the week
Measure three portions of 240 millilitres each:
720 mL ÷ 3 = 240 mL per portion
Keep one for dinner, refrigerate one in a shallow covered container, and freeze the third as soon as it has cooled safely. The frozen portion is how this sauce serves a full week without asking a refrigerator to stretch a three-day limit.
Two portions total 480 millilitres, approximately 2 US cups, can cover about 12 tortillas in an enchilada build; the NMSU reference recipe uses 2 cups for 12 tortillas. Another portion can become the base of a chile colorado braise. A portion can also be reduced or seasoned into a table sauce, but do that as a separate measured recipe rather than changing the storage batch at random.
For a smaller use, stir a measured spoonful into the tomato base for sopa de fideo or add it with the tomato in calabacitas con elote. It is not a direct substitute for the canned chipotle and adobo in the site's chicken tinga tacos; that switch changes smoke, salt, acid, heat, and liquid together.
Refrigerate for three days or freeze
Divide sauce into shallow covered containers and refrigerate or freeze within 2 hours, or within 1 hour if the room or outdoor temperature is above 90°F (32°C). FoodSafety.gov gives those limits, recommends a refrigerator at 40°F (4°C) or below, and advises shallow portions for faster cooling.
For this sauce, use or freeze the refrigerated portions within 3 days. That follows the sauce-specific NMSU guidance, even though broader cooked-leftover charts commonly allow 3 to 4 days. Label each container with the date, chile ratio, and 240-millilitre amount.
Thaw frozen sauce in the refrigerator or reheat it directly in a saucepan from a suitable freezer container. Stir as it warms and add water in measured 15-millilitre increments if it has tightened.
This is not a canning recipe
This flexible fresh sauce has not been tested for shelf-stable storage. Do not water-bath can it, pressure-can it, or make it shelf stable by adding an improvised amount of acid.
Tested canning recipes fix ingredient proportions and process details for a reason. The National Center for Home Food Preservation's Choice Salsa guidance says not to alter the tested proportions of tomatoes, vegetables, and acid for its boiling-water process. Use a current tested recipe exactly as published when canning. Refrigeration and freezing are the storage methods for this sauce.