How to Use Dried Chiles: Toast, Soak, and Blend
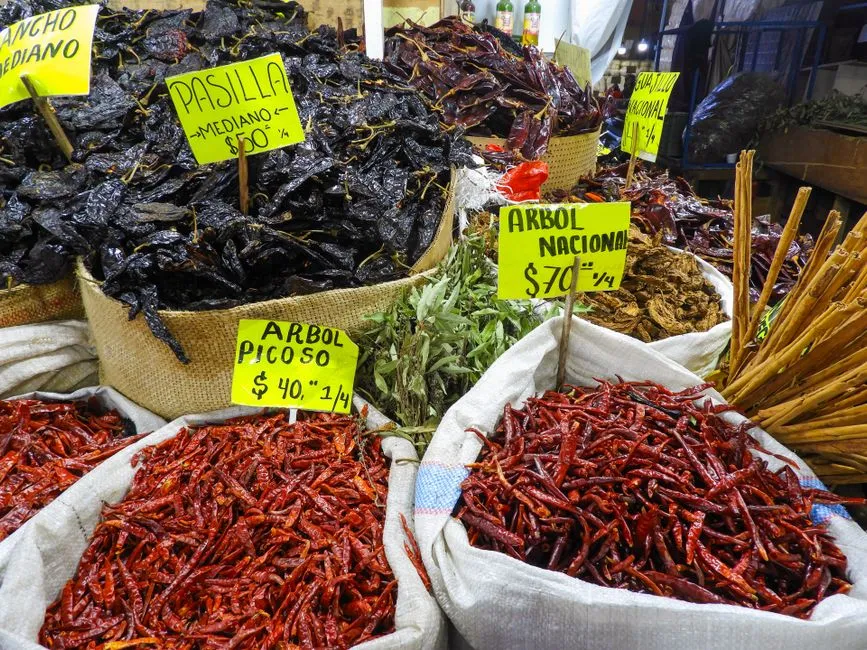
- Toast for aroma, soak for flexibility, blend by weight
- Technique at a glance
- Choose sound dried chiles
- Protect hands, eyes, and air
- Clean without soaking away control
- Toast seconds, not speeches
- Soak under the surface
- Blend with fresh liquid in stages
- Strain according to the dish
- Cook the puree for its actual recipe
- Diagnose bitterness before adding sugar
- Store it as a perishable fresh sauce
- Do not convert this method into a canning formula
Toast for aroma, soak for flexibility, blend by weight
To use dried Mexican chiles, choose flexible pods without mould, wipe them clean, remove stems and most seeds, and toast briefly in a dry skillet only until fragrant. Cover them with just-boiled water for about 20 minutes, drain, then blend with measured fresh water or broth. Strain when a smoother sauce is needed. Avoid smoke, protect eyes and skin, and refrigerate fresh puree promptly; it is perishable, not an automatic canning recipe.
This method uses 40 grams prepared dried chiles and 240 to 360 millilitres fresh blending liquid. The range is deliberate. Different pods absorb different amounts during soaking, and a spoonable marinade needs less liquid than a soup base.
Technique at a glance
- Prepared chile weight: 40 grams after stems and loose seeds are removed
- Soaking water: 600 millilitres, discarded after use
- Fresh blending liquid: 240 millilitres to start, up to 120 millilitres more
- Preparation: 15 to 20 minutes
- Toast: 3 to 6 minutes for a small batch
- Soak: about 20 minutes
- Blend and strain: 10 to 18 minutes
- Total: 48 to 64 minutes
Minimum: 15 + 3 + 20 + 10 = 48 minutes. Maximum: 20 + 6 + 20 + 18 = 64 minutes. Very thick or old but sound pods may need 5 to 10 extra soaking minutes.
The method is a base, not a finished salsa. Salt, acid, aromatics, cooking, and final liquid depend on the recipe that receives the puree.
Choose sound dried chiles
Look for pods that are dry but still somewhat flexible, with a clear chile aroma and color typical of the variety. Avoid visible mould, damp patches, insect damage, rancid or musty odor, and pods that crumble into flavorless dust with light handling.
A brittle chile is not automatically unsafe, but it may be old and muted. A damp or mouldy one is not a thrift challenge. Discard it without sniffing closely.
For a balanced practice batch, combine mild-to-moderate dried chiles whose flavor you already know. Ancho often brings a broad, raisin-like sweetness; guajillo tends toward brighter red-fruit and tea-like notes. Individual harvests and storage differ, so treat these as tasting descriptions rather than guaranteed specifications.
Do not rank a chile's usefulness only by heat. Aroma, skin thickness, bitterness, color, and the final dish matter. Heat can be added at the table; burned flavor has fewer exits.
Protect hands, eyes, and air
Work with ventilation. Open a window or use an exhaust fan that vents outside. Toasting should make the chiles fragrant, not fill the room with irritating smoke.
Wear food-safe gloves if your skin is sensitive, the chiles are hot, or you use contact lenses. Avoid touching your face. After handling, wash hands, the knife, board, and counter with soap and water. Capsaicin can remain on surfaces and has a remarkable memory for the exact moment you rub an eye.
Keep children and pets away from the preparation area. If the skillet begins smoking or anyone coughs, remove it from heat and ventilate. Do not lean over the pan to investigate more personally.
Clean without soaking away control
Wipe each chile with a barely damp clean cloth or paper towel, then dry it. If the pods are visibly dusty, rinse them briefly under running water and dry thoroughly before they approach the hot skillet.
Do not use soap. Do not leave them in water at this stage; the measured 20-minute soak comes after toasting.
Cut off the stem. Slit the pod lengthwise and open it flat. Shake or scrape out loose seeds and pull away large pale veins when you want a gentler puree. Seeds are not the only source of heat, so removing them cannot promise mildness.
Weigh 40 grams after this preparation. Starting with four whole pods is not a formula because one dried chile can be twice the mass of another.
Toast seconds, not speeches
Heat a dry heavy skillet over medium-low. Add one or two opened chiles at a time. Press each flat with a spatula for about 5 to 10 seconds, turn, and toast the second side for another 5 to 10 seconds.
Remove the chile as soon as it becomes fragrant and slightly more pliable. A few color changes are fine. Dark blistering, harsh smoke, or an acrid smell means the heat is too high or the contact too long.
Toast the 40-gram batch in small rounds, usually 3 to 6 minutes total. Do not stack pods or leave them unattended. The difference between aromatic and bitter is measured in seconds, which is rude but manageable.
If a chile scorches badly, discard it. One blackened pod can dominate the puree. Wipe burned flakes from the skillet and lower the heat before continuing.
Toasting is optional. Skip it when you want a gentler flavor or cannot ventilate adequately. Soaking still softens the pods for blending.
Soak under the surface
Place the toasted chiles in a heat-safe bowl. Pour 600 millilitres just-boiled water over them. Set a small heat-safe plate on top to keep the pods submerged.
Soak for 20 minutes. Check a thick section: it should bend and tear easily. If it remains leathery, soak 5 to 10 minutes longer.
Drain the chiles, reserving the soaking water only long enough to taste a cooled spoonful if you are curious. It may be flavorful, or it may be bitter and dusty. This base method discards it and uses fresh liquid so the result is easier to repeat.
If another recipe uses soaking liquid, count it inside that recipe's measured liquid. Do not add 300 millilitres soaking water to a sauce and continue pretending the liquid ratio is unchanged.
Blend with fresh liquid in stages
Let the softened chiles and liquid cool until safe for your blender. Put the chiles in the jar with 240 millilitres fresh water or the broth specified by the receiving recipe.
Blend for 45 to 60 seconds, stop safely, scrape the jar, and blend again. If the mixture will not circulate, add liquid in 15-millilitre increments. The maximum additional amount in this base is 120 millilitres:
240 mL + 120 mL = 360 mL maximum blending liquid
Record the amount actually used. A thick paste may stop near 240 millilitres; a pourable base may need all 360.
Never seal very hot liquid in a blender unless the manufacturer explicitly provides a safe method. Heat can build pressure and force the lid upward. Fill limits and venting designs vary by appliance, so use its current instructions rather than inherited kitchen folklore.
Strain according to the dish
For a smooth sauce, press the puree through a medium-mesh strainer with a flexible spatula. Scrape the underside into a clean container. Discard tough skin and seed residue.
For a rustic soup or braise, straining may be unnecessary if the blender breaks down the skins sufficiently. Taste a small cooked spoonful before deciding; raw puree can taste harsher and less integrated.
Weigh the final strained puree and write the amount beside the liquid used. If the batch yields 420 grams and you want four equal portions:
420 ÷ 4 = 105 grams per portion
That is an example, not a promised yield. Soaking absorption, straining pressure, and liquid additions change the result.
Cook the puree for its actual recipe
Freshly blended chile puree usually benefits from cooking with oil, aromatics, tomato, broth, or the main ingredient, but time and seasoning belong to the finished dish. Do not present this unsalted base as a complete enchilada sauce, salsa, or marinade without testing that formula.
For sopa de fideo, a small measured amount can enter the tomato base, with its liquid counted in the soup total. For calabacitas con elote, add a spoonful with the tomato and expect the pan to need a little more evaporation.
The chicken tinga taco recipe uses canned chipotle and adobo for a specific smoky, salty sauce. This fresh dried-chile puree is not a one-for-one substitute: it changes heat, smoke, salt, acid, and liquid at once. Develop that variation as a separate measured batch.
Diagnose bitterness before adding sugar
Bitterness can come from scorched pods, old chiles, seeds and veins, or soaking liquid. Taste the prepared chiles and the cooked puree separately when possible.
If the puree is mildly bitter, straining and cooking it with the finished recipe may help. Tomato, onion, fat, salt, and acid can balance flavor, but adding sugar blindly may create a sweet bitter sauce rather than solve the cause.
If the puree tastes strongly burned, restart. A fresh batch costs less than recruiting every other ingredient into a rescue mission.
Store it as a perishable fresh sauce
Transfer puree to shallow covered containers within 2 hours and refrigerate at 40°F (4.4°C) or below, following the time-and-temperature rules in USDA leftovers guidance. This guide uses 3 refrigerated days as a conservative editorial limit for the untested fresh puree; that is not a government-validated shelf-life study. Freeze portions you will not use in that window.
Freeze measured portions for longer storage. Label each with chile blend, weight, liquid, and date. Thaw in the refrigerator or as part of a cooking process suitable for the container and recipe.
When reheating a cooked leftover dish containing the puree, reach 165°F (73.9°C). The puree itself may later be used in a recipe with a separate validated safety endpoint; follow the requirements of that whole dish.
Do not convert this method into a canning formula
This flexible puree is not tested for shelf-stable storage. Pepper variety, low-acid vegetables, added tomato or onion, acid, jar size, and processing method all matter in canning.
The National Center for Home Food Preservation's tested salsa guidance warns not to alter the tested proportions of tomatoes, vegetables, and acid when using its boiling-water process. Use a current tested preservation recipe exactly as written. Do not add vinegar by instinct to this puree and place it on a shelf.
Refrigerating or freezing gives this technique plenty of useful range. Shelf stability is not a personality trait a sauce acquires from confidence.